You’ve just designed the perfect brochure for your new client. It’s eye-catching, vivid tones will blow their minds, for sure! You hit ‘print’ and can wait to see how this masterpiece will look in the clear light of day… wait… what’s this?!? Why does the grass look blue!
We’ve all been there. Your print just doesn’t look like it does on screen.
Don’t worry we’ve got you covered. Here’s our guide to printer calibration…

Why do I need to calibrate my printer?
Just because your laser printer isn’t producing the same great results that it once did, it doesn’t mean that it is broken.
Laser printers use many different voltages across many different components to create the crisp, colourful images that you normally expect to see.
Over time things like general wear-and-tear, long print runs and even environmental changes will slightly alter those voltages.
This results in colours shifting hue. For example, blue may look more purple, or greens may look yellowish.
It’s quite a straightforward process to re-calibrate your printer without calling out an engineer. I’m going to explain exactly how to do it.
Printer calibration
Most printers have a built-in feature which enables you, as an end user, to calibrate the device to ensure consistent colour reproduction without calling out a technician.
Depending on your printer model, the calibration option will be found under the ‘Maintenance’, ‘System Settings’, or ‘Adjustment’ menu.
For this article, I’m going to show the process on a Konica Minolta multi-function printer. Whilst the options and layout may be different to your own printer, the process will be very similar.
How to adjust printer calibration
Firstly, access your printer’s menu or utility screen:
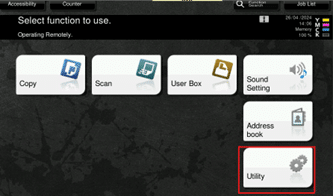
On Konica Minolta devices you will then need to access ‘Expert Adjustment’:
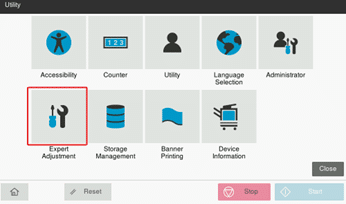
Konica Minolta devices require the admin password at this point. The default is 1234567812345678.
Now select Gradation Adjustment:
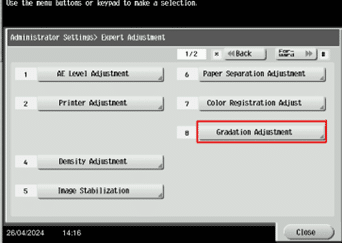
Step 1: Konica Minolta devices force you to run ‘Image Stabilization’ before the actual calibration pages a printed.
Hit the ‘Start’ button and you will then hear the machine spring to life as though it is going to print.
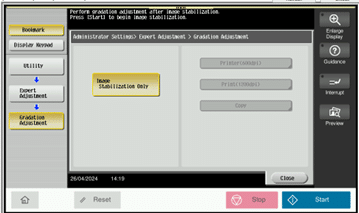
Once it stops, the other buttons become available.
Step 2: Press ‘Printer(600dpi)’
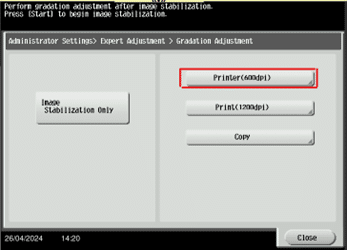
Step 3: Select either A3 or A4 depending on the paper available in your device. Click ‘Start’ and the device will print out a calibration sheet.
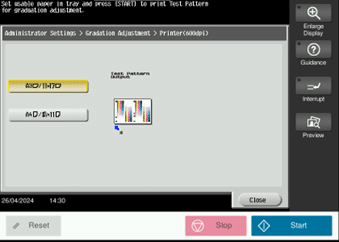
Step 4: Following the instruction on-screen, line up the calibration sheet on the copy glass and press ‘Start’ to begin scanning.
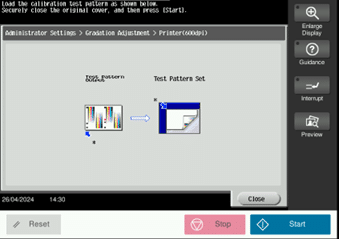
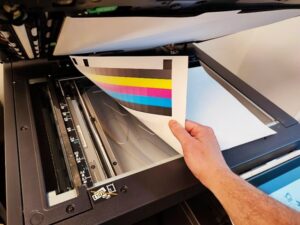
Step 5: The device will read the colour patches from the page and re-calculate the print voltages to bring the printed image back to the expected values.
When the scanning is complete repeat steps 3-5 for both ‘Printer(1200dpi)’ and ‘Copy’.
After you have completed all 3 calibrations, you can close the menu and return to the main screen.
Now go ahead and test out the printer. Hopefully, you should see some improvement.
If you are still having issues with quality or colour balance it may be time to give your local managed print provider a call.

